CloudPayments is a useful service for processing e-payments by Visa, MasterCard, Maestro, and Visa Electron. To connect it to your uCoz site, follow the steps below.

Create an account with Cloudpayments. To do this, follow the link and fill in the form.
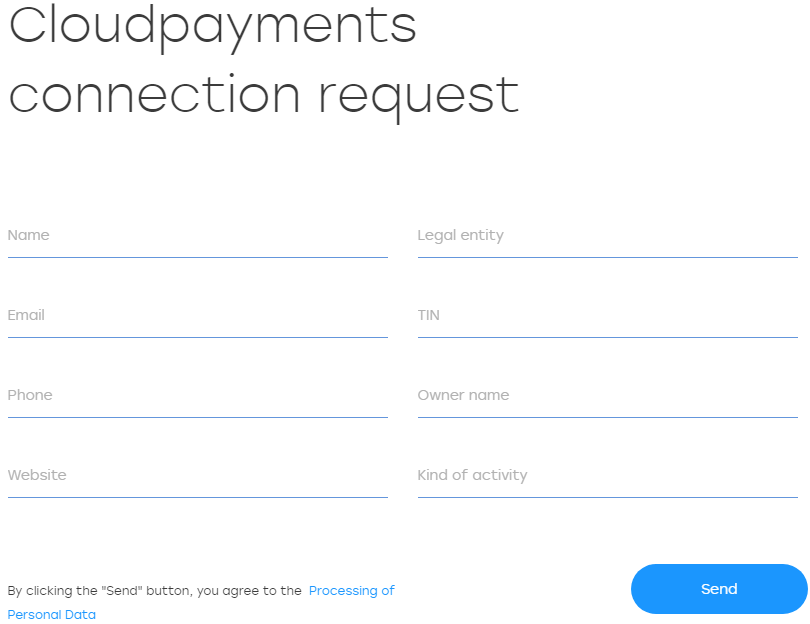
Once the request form is filled in, you will be contacted by a CloudPayments manager and receive a message to the specified email with a system authorization link to set up a password.
After that, you will be redirected to your CloudPayments account. Go to the Sites tab on the left panel where the list of sites connected to the system is displayed.
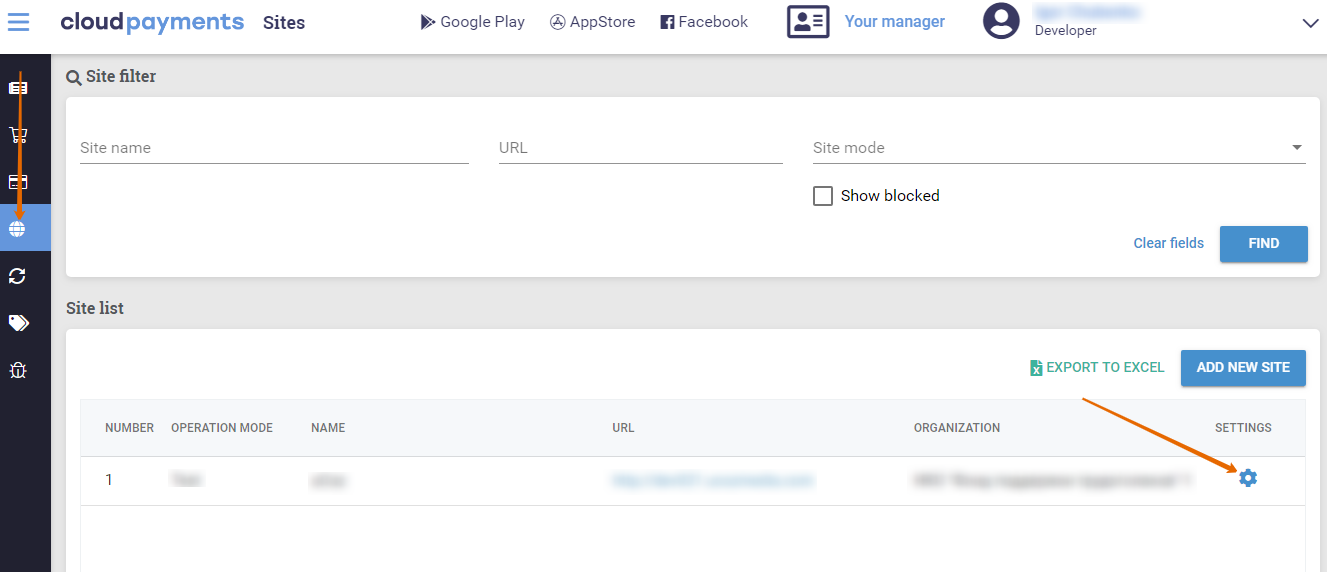
Click on the gear icon next to your site to view your Public ID and API Password
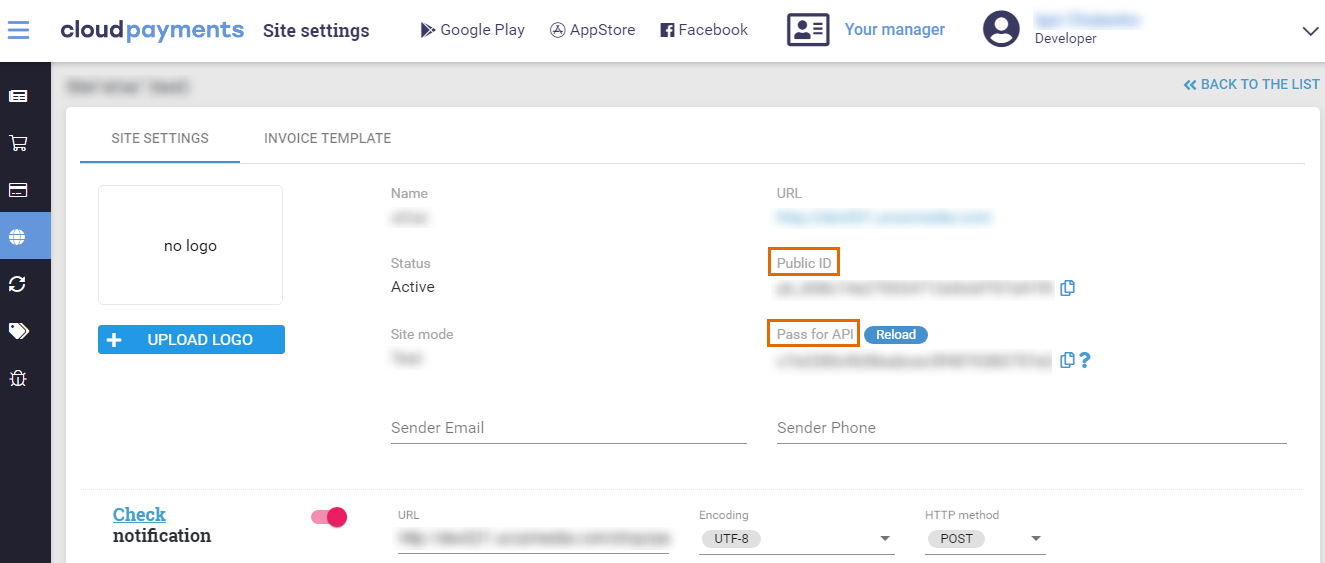
Save the received information. To activate this payment method go to the Control Panel of your site and click on the Online Shop tab.
Then, go to Payment, shipping, currency and rates section and click on Add a new payment method.
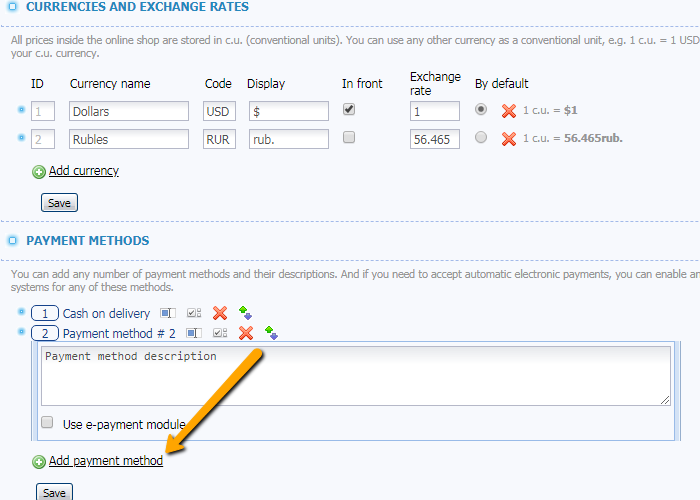
Tick the Use electronic payment module box and select the CloudPayments option from the list.
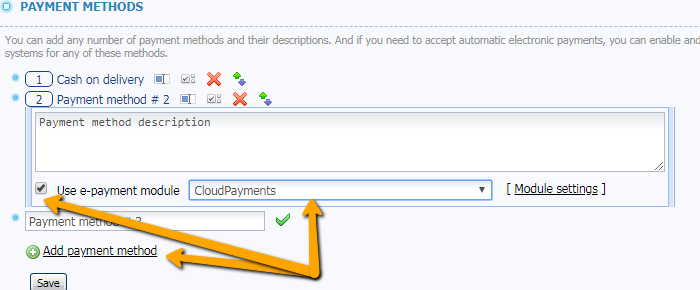
Then, go to the Module Settings.
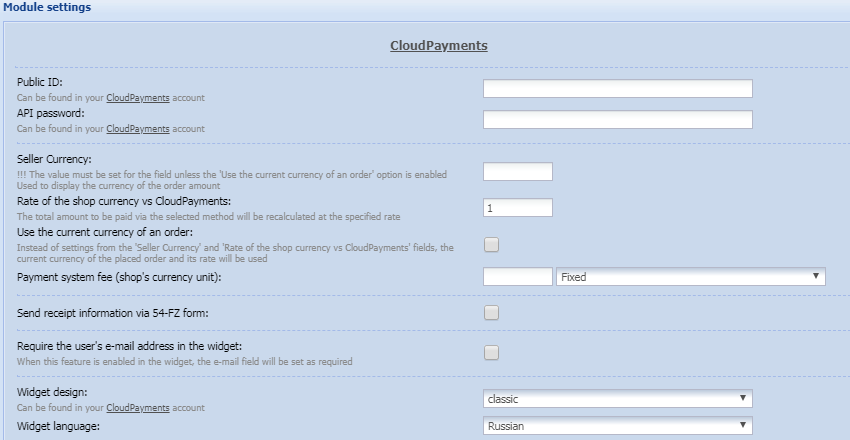
- Public ID and API password — this data сan be found in your CloudPayments account;
- Seller Currency — used to display the currency of the order amount;
- Rate of the shop currency vs CloudPayments — the rate at which the total order amount will be recalculated;
- Use the current currency of an order — instead of settings from the fields Seller's currency and Store's currency rate to CloudPayments currency the currency and its rate from the settings of the store where the order will be placed will be used;
- Payment system fee (shop's currency unit) — an extra option specified when it’s necessary to add a margin to the total order amount. It’s taken from the shop by the payment system;
- Send receipt information via 54-FZ form — an extra option activated when you want CloudPayments to send data to a POS when paying for the order. It allows you to set up all the necessary data to be correctly generated and sent a receipt to a buyer;
- Require the user's email address in the widget — an extra option that can be enabled in the Payment widget to mark the email field as required;
- Widget design — an extra option that allows you to set one of the Payment widget designs;
- Purpose of payment — a payment description. You can use the $INVOICE_ID$ tag that will be automatically replaced by a number of the paid order.
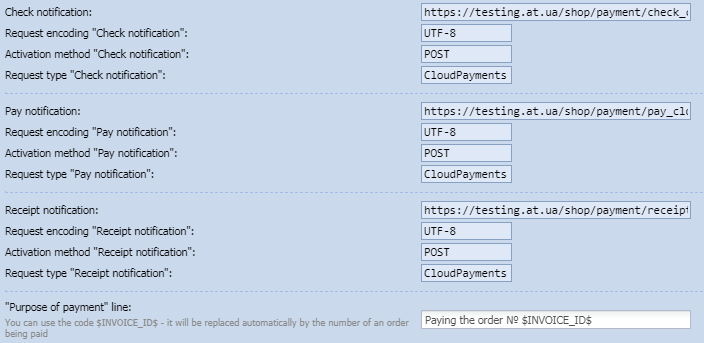
- Specify the values that are displayed in the payment method settings in your CloudPayments account (where the "Public ID" and "Password for API" values are located) for the Check notification, Payment notification, and Receipt notification options.
And that’s it! If the data you filled in is correct, your online store is ready to accept payments withCloudPayments!
